Here is the before and after of my "Guy Fawkes" image which can be seen here: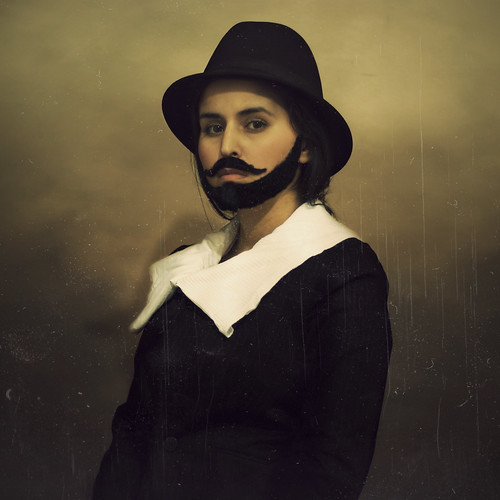
OK, so before I put up the before/after, I would like to say that I decided to include the crop I used in the picture as part of this because otherwise the comparison looks a bit weird.
(click for larger view)
As a very brief and quick "how to", I'll explain what I did.
Well, you can see the before pic - that's where it started (not including the initial crop). I first took it into photoshop as a RAW file and worked on things like white balance and exposure, highlights, lights, darks, and shadows. I then moved the pic from camera raw to photoshop's main part. Here, first flipped the image then I cloned the beard all the way up properly so it covered my whole jaw entirely. I then changed the colour of the hat by selecting only the hat and the area around it on a duplicate layer then going to "replace colour". Because I hadn't selected around the hat only, I had to then create a mask and paint back in the parts of my head and hair I needed. I then did the same for the jacket making it a little darker. Then I added a "painting texture" and set it to "multiply" as the blending mode and made a mask painting back in my own body so the texture remained only behind me. Then I messed further with curves, gradients, colour overlays and that sort of thing to get the tones exactly as they appear in the pic. I then applied a slight grunge texture on about 20-30% opacity. And lastly I applied a very small vignette and voila.
That's the most photoshop I've done on a single image in ages but I dont mind it. I like photoshop so its cool :)
Guy Fawkes - before and after
at 22:10
Subscribe to:
Post Comments (Atom)

2 comments:
great explanation...
I suspect some of the nunaces about how, for example, the colortone on the face changed, are down to intuition and personal skill which it would be difficult for others to emulate, but there's a lot here that we can try out for ourselves...
merci :)
that should of course say 'nuances' ...
Post a Comment